April 23, 2008

Easy appliqué with a dryer sheet


I really caught the tutorial bug from Sew, Mama, Sew! This is a tutorial about how to use a dryer sheet to make appliqué easy, quick, and non-scary. You could also use lightweight interfacing if your family doesn't use dryer sheets or if you are sort of a worrywart about your quilting . Your dryer sheet should be USED, and completely free of its fabric softener and chemicals. Tossing it in a load of wash after it's been used in the dryer should do the trick. Don't iron the dryer sheet, it will melt (ask me how I know). Throughout this tutorial, click the pictures to see them larger with glorious detail.

So, to start, gather a piece of scrap paper, a marker, scissors and the dryer sheet.


Draw your design on the paper, at the size you want your finished appliqué to be. Exception: long skinny things (like the beak, as seen below) should be drawn slightly longer and fatter than you intend them to end up.


Now lay the fabric sheet over the drawing. Trace the drawing onto the dryer sheet with the marker. This is the magic of the dryer sheet. It's kind of like fabric and kind of like tracing paper!


Find a piece of fabric big enough to accommodate your design plus 1/4" around. Lay the fabric right side up then put the dryer sheet over it, right side up. I know it seems wrong. Trust me.


Stitch along the pattern line, around the entire design. I prefer to do this step by machine but you can hand stitch just as well if you take small stitches.


Cut the piece out 1/4" from the stitching.


Clip the fabric away from any points. Snip the fabric along any concave curves (On the bird I clipped the crotch, the back of the neck, and under the beak). Skipping this step will cause heartache and gnashing of teeth! Do it!


Now use a sharp scissors to cut a slice just in the dryer sheet and not the fabric. Turn the piece right side out through this hole. No worries if you rip the slice farther, just try to keep the dryer sheet intact where it meets the fabric. The dryer sheet is going to end up sandwiched between your appliqué and your backing, so don't give it much mind.


See how all the raw edges are behind the fabric sheet? Now they can't shred when you're appliquéing!


Iron the appliqué from the fabric side to make it nice and flat. See how nicely it matches the original drawing!


Now you are ready to attach the appliqué to whatever backing you wish. If you already know how to appliqué, I hope you enjoyed the dryer sheet trick! If you don't know how to appliqué, read on... Put your appliqué where you want it and pin it down.


Thread a sharp needle. Knot the end of the thread. Bring the needle up from the wrong side of the backing, directly next to the appliqué. Reminder : enlarge these pictures by clicking on them if you need more detail.


Now put the point of the needle inside the folded edge of the appliqué, right next to where the thread is coming up from the backing.


Bring the needle back out of the folded edge of the appliqué, making a stitch about 1/4". Pull your thread through.


Now you are going to take a stitch below the backing WITHOUT turning your work over. Put the needle in the backing directly beneath where the thread is coming out of the appliqué.


Bring the needle back up, directly next to the appliqué, making a stitch about 1/4". Pull the needle through.


These are the only two stitches involved in appliqué. A stitch inside the folded edge of the appliqué...


Alternated with a stitch behind the backing... Whenever the thread comes up out of one fabric, it dives directly into the other fabric, so you end up seeing very little of the thread. It is always either traveling behind the folded edge of the appliqué or traveling beneath the backing.


Eventually you will realize that you can take a stitch in the applique, then go right into the stitch behind the backing, without pulling the thread through between stitches.


I like to make sure there is always a stitch right at any corner, to keep the appliqué well secured.


When you get back to where you started, take the needle beneath the backing, turn your work over and tie your thread off. You should see a dashed line of stitches in the outline of your applique.


And you're done. Hope that helped... Now, how about this rocking bird skirt!

April 21, 2008

Four years later


I started this quilt four-plus years ago. And for some reason yesterday I was seized with the motivation to quilt it.... I'm about two-thirds done!

It is a testament to scrappiness and free-piecing. I have changed a lot as an artist and quilter since starting this quilt, but I am still very pleased with it. I'm excited that I may finally be able to snuggle under it soon.

April 19, 2008

Purse notebook with fabric cover

In appreciation for all you readers' lovely encouraging comments I want to share a tutorial. Well, I do also want to enter the Sew, Mama, Sew tutorial contest. I came up with this idea because I have had countless notebooks shredded in my purse. I wanted a sturdy, beautiful notebook that could survive the harsh purse environment. This project took me about 45 minutes, which included me agonizing over my fabric choices. Click on the thumbnails for mammoth-sized images.

Start with a book-style notebook. I use a mini-composition book with strong cardboard sides. On a scrap piece of paper, trace around the top, edge and bottom of the book.


Then, holding the book in place, wrap the paper snugly around the spine of the book. Flip the book and paper over without letting the book shift in place. Lay the paper back open. Trace around the book again and connect any gap in the lines. You will be left with a pattern of the wrap-around dimensions of the book.


Cut the pattern out leaving a 3/8" to 1/2" seam allowance.


Using this pattern, cut three separate pieces of fabric. One for the cover, one for the flaps, and one for the liner. Don't worry too much about the liner fabric, very little of it will be seen. Cut the flap fabric in half.


Fold over the cut edge of each flap 3/8" and stitch. Iron so the turned edge is flat.


Now layer your fabrics. Liner fabric face up. Then flaps face up. Then cover fabric face down.


Pin the fabric stack together and stitch a scant 1/4" from the edge, leaving an opening of 1-2".


Turn your work right side out through the opening you left. Iron the opening if needed to make sure the seam allowance stays turned under.


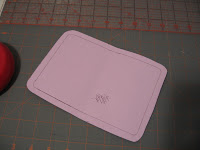
Top stitch close to the edge around the entire cover, and slip the book covers inside the flaps!


This pattern could be easily adapted with a closure or elastic band. It could be used for any size book. I hope you enjoy!

April 17, 2008

Abstinence for Realists


Pardon me while I get a little off topic here - but I had a good laugh when I learned about this new brand of condom available online. A recent study showed that while abstinence only sex education may briefly delay the onset of sexual activity, it results in teens being less likely to use condoms and contraception when they do become sexually active. Even worse, uninformed individuals may resort to dangerous attempts at preventing pregnancy or STDs (as this story suggests). As someone who works every day to keep sexually active youngsters healthy, this condom is the kind of abstinence I can get behind. The kind that acknowledges that eventually, abstinence comes to an end... and you'd better know what to do at that point.

I recently heard a true story of a mother who bought her 12 year old son two boxes of condoms and told him not to come out of his room until he could put them on in the dark with one hand behind his back. He is now an avid peer sex-educator. Wow! I know we can't all be that mom or that kid. But if you have young people in your life, take one small minute now to think about what you can do to increase their awareness of how to care for themselves as they develop sexually. One mom I know has a drawer in the house where the kids know there will always be plenty of condoms, and that the condoms will always be replaced without questions. She tells the kids their friends can take the condoms too. Brilliant.

Last week I had a mom come to our clinic with her 16 year old daughter (who had been sexually active for a year) to get her daughter on birth control. She blinked back tears throughout the visit, feeling a little overwhelmed at seeing her baby as a sexually active young woman. I was so proud of her for being brave enough to face those intense emotions, deal with such sensitive stuff, for her daughter's health. It was clearly not easy for her. In fact, it looked downright messy and uncomfortable. But she did it.

On our patient forms we ask: How old were you when you became sexually active? Every day I will see at least one patient who answers 13 or 14. And at least weekly someone answers 12 or 11. I mention this to convince you that it is not too early to talk about sex in your house! If you are already doing this, thank you. You are not only keeping your kids healthy, but all their friends too. As we in the medical profession know, they trust their friends way more than anyone with a healthcare degree. So get as much accurate, straightforward information into their little circles as you can!

Ok, ok. Soap-boxing finished...for now.

April 15, 2008

Yo Yo mania


Maybe seven yo yos don't qualify as mania, but they were an easy portable craft that kept me occupied and not worrying about sudden death on my flight home from San Francisco. Clover makes these cute yo yo makers in four sizes. As you can see, I only owe one size. These have a pretty ingenious design with great instructions included for making perfect little yo yos quickly from fabric scraps. Also nice for idle hands enjoying some TV time. Word to the wise - use strong thread.

April 12, 2008

Quilt abuse

That's fair warning for anyone who will be distressed to see how I repurposed a fraying vintage quilt top to make a laptop case for my recent trip to San Francisco (which is, by the way, my excuse for two weeks without blog entries).


The case was hastily constructed when I couldn't bear the thought of another voyage with my former uninspired, bulky and ill-fitting purchased laptop case. The bag is padded with some quilt batting and "headliner" which I found in the remnant section - this is the stuff they put on the ceilings of cars. I really love looking at the fabrics in this quilt top. A close of of my favorite - the orange pigs.