March 13, 2012

Making your own english paper piecing templates

Well this is what blogging will do to you. I would have been perfectly happy just ordering my paper pieces online and doing my little project. But with a blog I have this sense of responsibility. What if I get someone excited about the pattern and they can't buy the templates? So I've wrestled with my ruler and printer and found simple-enough solutions to share.


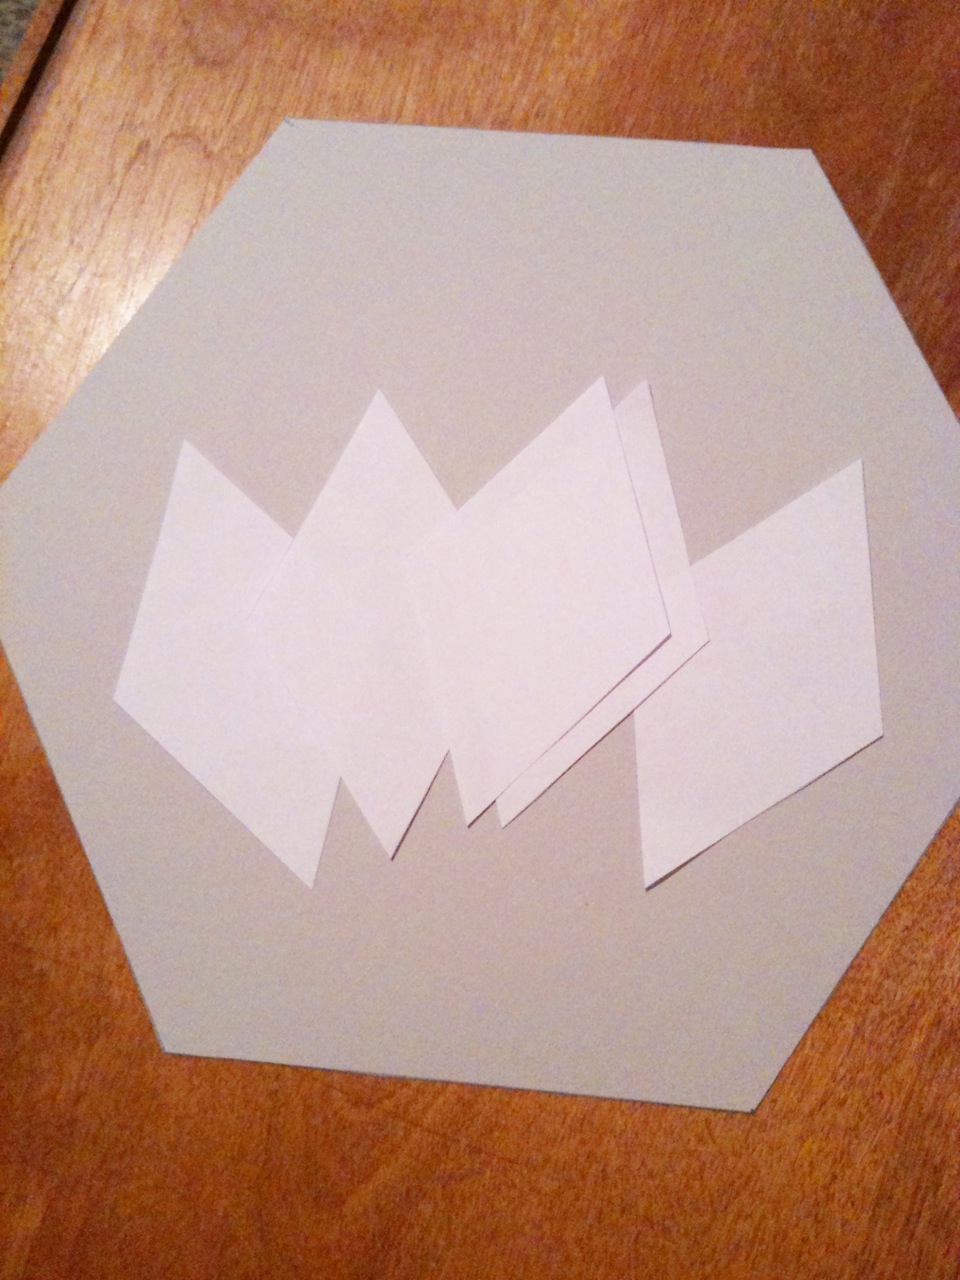
For the diamonds: You're going to want about 500 of these dudes unless you join your units as you go, and even then you'll need a few hundred. So let's rustle up some scrap paper. Using either 8.5'' x 11'' or A4 paper, you should get 15 diamonds on each page that you print. You can actually get 30-60 diamonds for every printed page though, if you use the little trick below. 

First, go here. Choose your paper size. Change "minimum border" to 0. Change "block size" to 2 inches. Download the pdf, then go to print the document. Make sure that the "page scaling" setting is set to "none". When it's printed, measure a side of one of the diamonds and make sure that they have in fact printed at the right size.

Now get another 1-3 pieces of scrap paper, and put them under your printed sheet. Staple the pages together. Cut out carefully along the lines with sharp scissors. You may decide to use thicker card stock paper, and if so you'll probably want to cut just two sheets at a time, but I was able to accurately cut four sheets of regular weight paper at once.


To draft the hexagon: you need a piece of paper, a pencil, scissors, and your ruler. You'll see that there is a piece of painter's tape just beneath the 60 degree line on my ruler. This made it easier to see and also provided a slight edge that made aligning with the edge of the paper easier. I recommend it.
So, make two marks, four inches apart, centered on the long edge of the paper. This will be one side of the hexagon.


Now line up the 60 degree line with the bottom of the edge of the paper, and use it to draw a right-leaning line through the right-hand mark (the 60 degree lines lean opposite ways on opposite ends of your ruler, so if the one end isn't angled the way you want, flip your ruler around).


On that line you just drew, make a mark exactly four inches from the mark at the corner.

Now repeat the last two steps, making new angled lines and marks four inches from the last. Repeat until you have six sides. If your last line goes through your first mark, you did it!


To cut out several at a time, lay a few pieces of paper underneath, and staple together in a few places before you start cutting. Mine matched up almost exactly with the ones I ordered online.


The test: do two of your diamond sides equal one of your hexagon sides? Perfect.
However you get your paper pieces, I'll be back to walk you through cutting the fabric soon!

March 08, 2012

Sprocket quilt along: the details

I named this pattern Sprocket after seeing the first finished unit. It just seemed to fit. Plus, it's the name of my uncle's cat!


I'm really enjoying working on it. I'm so glad I took the time to plan out a handwork project. It turns out I have a few minutes here and there for hand stitching and it's great to have something ready to go when they happen. In case you'd also like to try this pattern I'll give the how-to step by step.

Here are the posts I've done so far:
Making a travel sewing kit
Making your own paper piecing templates
Cutting fabric
How to love English Paper Piecing
Basting Paper Pieces
Piecing Paddles
Constructing a Sprocket

Background

I'm using a method called English paper piecing. This means I wrap fabric around paper and temporarily baste it to hold it in a particular shape. After stitching those shapes together, the paper is removed. Simple precision patchwork by hand. Low stress. Go at your own pace.
The pattern requires two paper shapes: diamonds and hexagons. Both these shapes are measured by the length of one side. I'm using two inch diamonds and four inch hexagons. Of course, the pattern would also work in different sizes, as long as your hexagon sides are twice as long as your diamond sides. Thank you, geometry, for being so cooperative.

Layout


My quilt will have five vertical columns. Each column will have five and a half of the sprockets. Total: 25 full sprockets, 5 half sprockets. Why the half sprockets? I like the extending-off-the-edge look of my mockup.


The finished quilt should be 63 x 76 inches. Maybe you want a different size. This info will help you plan it:


Paper requirements:

A sprocket takes 36 diamonds and one hexagon. Once it's constructed, you can remove the 18 inner diamonds. The outer 18 will stay in until you've sewn all the edges around them.
I ordered paper piecing templates from here. They are so quick to ship. I ordered 500+ 2-inch diamonds and a small batch of 4-inch hexagons. They are the six point (60 degree) diamonds. If you just want to try the pattern you could get a small bag of 75 diamonds and draft your own hexagon (not hard, I'll show you how). You can finish three hexagons with that one bag, probably enough to know if you want to continue.
You could cut your own diamond templates instead. Sounds tedious to me, but we'll get to that.

Fabric requirements:

Hexagons: 1.25-1.5 yards (I easily got mine from 1.25 but it never hurts to have a little extra just in case!)
Background for 445 diamonds and finishing the edges: 3.25-3.5 yards.
Sprockets: you'll need 450 colored diamonds. You can get this from 15 fat quarters (30 diamonds per fat quarter) or 38 strips 2.5 inches wide (12 diamonds per strip)

Ok enough with the numbers. Back to sewing!

March 02, 2012

Travel Stitching: paper piecing kit and tutorial

I'm getting excited about my trip to San Francisco, and getting ready to kick off a little quilt along. Here's a tutorial for a simple sewing kit geared toward the English paper piecer. It's got a little stiffness. It's got two big pockets in case you're working on something large. It closes easily with an elastic band. It's quick to make.


The size is a bit arbitrary, based on the interfacing I had available. But since it's basically just a double sided piece of fabric folded in at the ends, you could adapt it to whatever size you want. I have been using this all week though and it is working well.


In mine I included a little tin with essential supplies. I epoxied a bit of felt on the inside for my needles and pins. A spool won't fit in this tin but it's perfect for bobbins. Also included is a thread cutter for airport-security-approved sewing. You could use nail clippers instead if you don't have a thread cutter.


Gonna make one? You need:

Outer and lining fabrics: 29 1/2'' x 10''
Small elastic hair band
Button (thrilled to finally have a use for this awesome vintage button)
Stiff interfacing: 2 pieces 7 x 8.5. I used Fast 2 Fuse, because I had it. You could also use something like Timtex. Or just cut up a cereal box. No biggie. You just want a little structure in there.


I have only a few pictures here. The thread I used is the exact same color as my linen so it was hard to see and therefore pointless to photograph. Luckily, this project is dead simple even without pictures.

1. Lay your outer and lining fabrics right side together. Sew both the long sides and one short side with a 1/4'' seam. Leave the other short side completely open.

2. Clip the corners, then turn right side out and press the edges.

3. From the finished short edge, mark a line 6 1/2'' in on the lining side. Stitch along this line. Insert a piece of interfacing.

4. From the last line you stitched, mark a line 7 1/2'' in. Mark another line 1/2'' from that. Stitch along both these lines. Insert the other piece of interfacing.

5. From the last line you stitched, mark a line 7 1/2'' in. Stitch along this line.

6. Turn in the open side of the pouch 1/2'' and press. Topstitch this edge closed. Topstitch the other short edge too, so it matches. If you used a fusible interfacing you can fuse it now.

7. Figure out which side you want to be the back. Attach your elastic band to the middle of the back side stitching line with a zig zag stitch. It should point toward the center lines. 


8. Fold in both short edges along the lines of stitching. Press. Pin/clip and topstitch around the entire pouch. Add the button wherever it needs to go based on the button and elastic hair band size.


I like that I can fold it back on itself for a smaller footprint. I like that it looks simple and not overwhelming visually.


I've used this over the week to stitch at work and at home during a occasional slow moments. It's nice to get a little sewing time even when I can't possibly be at my machine!

February 28, 2012

The last modular cathedral: Groove block

This block is basically the last block rearranged. I'm naming it after the fabric line "Groove" because it's what inspired this shape. It's the end of the line for the Modular Cathedral project. I think I may have saved the best for last!


Ingredients:
four 5'' squares
eight 2 1/2'' squares
1 1/2'' strip for border (optional)

Fold all the small squares in half along the diagonal and press.


Use small dots of glue to hold them in opposite corners of the 5'' squares.


Construct the block. Press seams like your life depends on it.


Pin back the folds and topstitch.


Here's all the blocks I've made. Groove is my favorite I think, followed closely by the original. I could see making an entire quilt of either of those. I'll stitch these all together someday, though certainly not soon.

What a fun little experiment this was! I realized going back and checking my links that I never made a tutorial just for the basic block, or that flower one in the middle row, so I'll be back with those tutorials. Eventually.

February 24, 2012

Pulled

I've pulled some fabrics for the To-Be-Named paper piecing project. I'm very happy that I'll have company from a few of you on this romp.


The colors were inspired by this piece of Kaffe Fasset fabric my grandma gave me. The orange and blue together have so much kick!


That guy really loves color, and I really love leaning on him for color schemes. I'm planning to pair all these with some Kona Sand that I have. It's been in my stash awaiting another use for far too long, so I re-appropriated it.

I reserve the right to totally change directions when I get the "Washi Tape" fabric I just ordered. I rarely feel compelled to buy fabric I've only seen online. But this one is so unique. Beautiful work Rashida! I don't often see transparency used in a fabric design and I really like it in this one.

I also pulled a winner for the book A Field Guide to Fabric Design. Congratulations Melissa at A Happy Stitch! Hope you find lots of inspiration in this book.

I had a fun day in the sewing room today. I'll fix up my pictures and share them this week!

February 22, 2012

Keeping my hands busy

I am a fidgeter who has a three day conference ahead of her. I can hardly sit still for a two-hour meeting, so I tremble whenever I have to sit down for a whole day. My answer to this conundrum is to keep my hands busy: English paper piecing to the rescue! And of course, I had to go design my own thing.


I love it already.  Each of the ring units should finish around 14 inches. Big and bold! The mock up is only to get an idea of the pattern. It will have more rings for a (60+ by 70+) throw quilt. 

This is the first time I've felt really excited about paper piecing. I can't wait to get to the airport and then stitch stitch stitch for three days.

Since I've gone and calculated yardage and finished size and exactly how I'm going to go about it all, I'm halfway to a quilt along, and I'd love to take you with me. Anyone else want to try this pattern? You may not get to see my finished quilt any time soon, but I'll get all the important steps out of the way up front so you can finish yours without me. Can't wait to cut up some fabric!

I'm stuck on what to call it. It changes twice a day. Glimmer? Starshine? Iris? I can't pick. Please point me in the right direction.

P.S. I just learned that some people like to read blogs by email. If that sounds like you, there's now a little box on the right side of the screen that will let you enter your email address to get automatic email updates any day I post something new.

February 20, 2012

A Field Guide to Fabric Design: review! giveaway!

The book A Field Guide to Fabric Design by Kimberly Kight was recently released by Stash books.
I was thrilled to receive a copy to review, and now I'm doubly thrilled to tell you about it.


I had one reason to want this book: I wanted to know how you design a repeating pattern. Not knowing was very perplexing for me. As far as I could tell, the only way I could design a repeating pattern would be to wrap a piece of paper around a tube and draw on it. That sounded borderline ridiculous so I needed this book.

Kim's book satisfied my curiosity, (no tubes!) but it did so much more as well.


First of all, a week after I read it I ended up designing my first fabric. Coincidence? Absolutely not. This book gave me the lift I needed to go from a good idea to an actual design. It helped me understand some important concepts that I could apply to the tools I had available. In my case, an iPad with a simple illustration program, but whatever your supplies are, even if they are just pencil and paper, there are instructions for you too. Do you want to do screen printing or block printing? Do you want to design with Photoshop or Illustrator for digital printing? All the steps are explained for whichever way you'd like to design.


The book also prepared me for dealing with color variation between my computer screen and online printers. Information on printing processes, types of fabric, and color theory are in there as well. There is a lot in the book I didn't expect. Some of it may not be useful to me right now (for instance, things to consider if licensing your designs) but I have to say I'm impressed at how thorough the book is. I can see that whether I just want to create an occasional fabric design, or if I get bitten by the bug and decide to pursue it as a serious venture, I will refer to A Field Guide to Fabric Design over and over in the coming years.

So now, indeed, Stash books has generously, enthusiastically, offered a copy of the book to giveaway to a reader. And as an expression of the incredible appreciation I have for this book, I'd like to send the winner a fat quarter of my first ever fabric as well. To enter the random giveaway, please leave a comment on this post, having something to do with this book and why it interests you. I'll draw a random winner Friday. Oh, and if I can't contact you, you can't win, so make sure you leave an email address if it's not available on your profile. I'm ruthless. I'll just draw another number if I can't contact you. And you'll never know how close you came.

FYI, my contact at Stash let me know they have an email newsletter. I signed up for it last week, and they immediately emailed me a coupon for 20% off at the C&T publishing site. And that's all I've heard from them so far, so I can tell you they're not spammers. You can sign up here (over on the right side of the page) to stay up to date too. Thanks for keeping it classy, Stash, and thanks for the never-ending stream of fabulous books!